


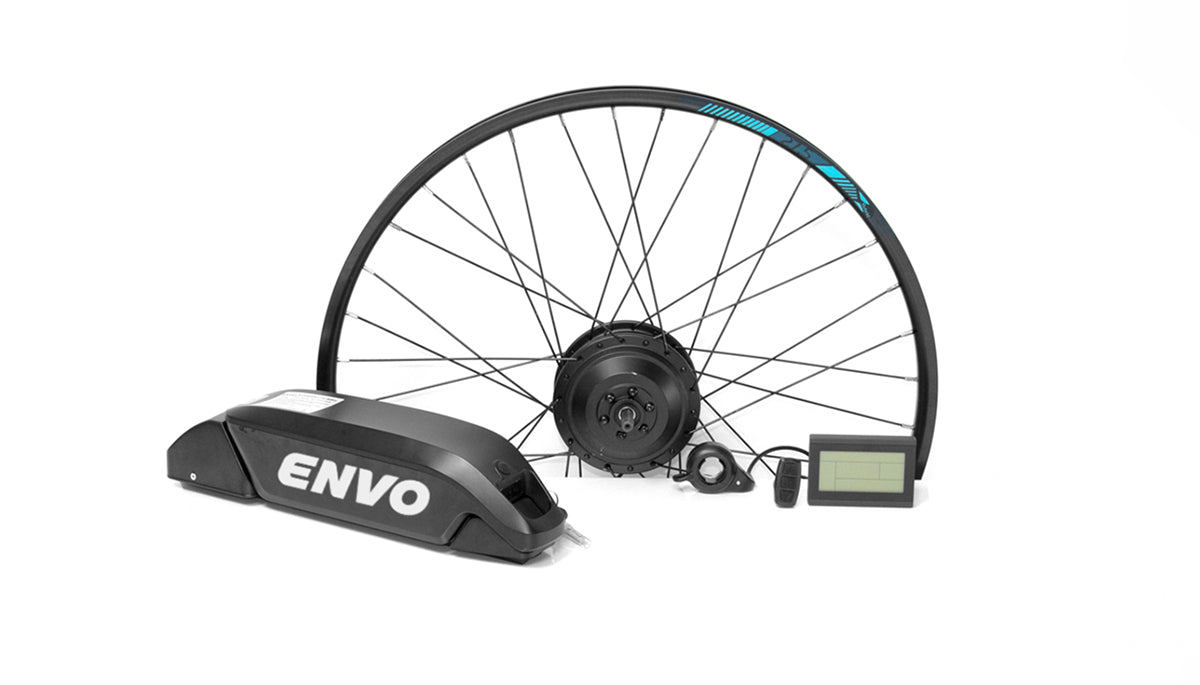
Table of Content
▶️ Know Your Service Intervals
▶️ Steps to Retrieve a Pristine Cassette
▶️ How to Adjust Your E-bike's Brake Cables?
▶️ Replacing Brake & Gear Cables, Explained
▶️ Complete Instruction on How to Adjust Derailleur
▶️ Check Spoke Tension Following This Guide
▶️ How to Inflate Your E-bike's Tires
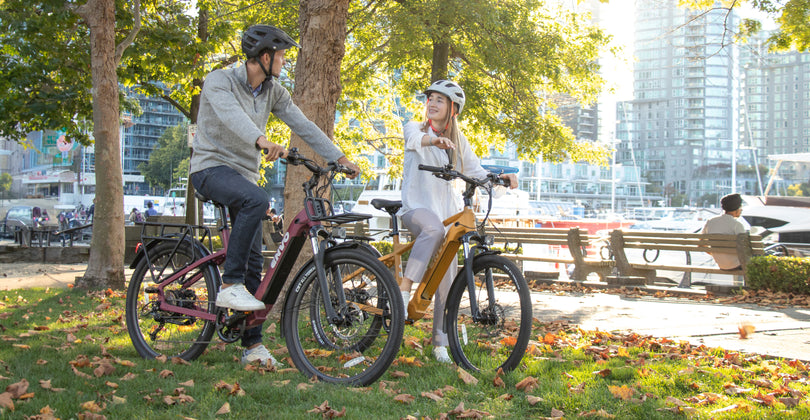
E-bike tune-up consists of regular checkups and bike maintenance every 1000 miles of the ride. The routine is necessary even if your e-bike is new. In fact, an e-bike is no different than your automobile. Did you ever forget to check on your vehicle? You probably didn't because the perks of regular car maintenance are apparent, and the same goes with bicycle tune-up.
Since electric bikes are machines, they will be susceptible to usual wear and tear after some time. Though parts like the motor, controller, or battery are maintenance-free, other features such as tires and brakes need special care and uptake.
Basically, we do tune-ups to achieve the following:
- Make sure to have a safe and enjoyable ride
- Extend the lifespan of our e-bike
- Save ourselves huge costs of any defective part replacement in the future
Moreover, you can take either of the approaches to do an e-bike tune-up:
- Leave this work to your local bike shop in exchange for service payment, and look for a bike tune up near you,
or,
- Roll up your sleeves and get busy doing it yourself.
Always double-check your bike with a professional mechanic before hopping on it if you choose the latter option. It will take time and patience to learn how to maintain or repair your own e-bike. Still, it will prove helpful if you are passionate about DIY and love discovering how your bike works.
Gradually, you will see how beneficial it is, and who knows? Someday you may also turn it into a side profession or hobby.
Before we review the list of regular e-bike tune-up and discuss each task to perform in order, let us start by explaining rider categories and tune-up timeframes. Then, we will explain what you must complete in every phase of a tune-up session.

Know Your Service Intervals
Do you know the proper service intervals and components to be checked to take good care of your e-bike? We can divide these intervals into three: Before, after 25 km of riding, and after 100 km of riding.
Before You Ride
To ensure you have a robust bike, check the bolts and fixtures to see if they are tight enough. Parts to be checked include the rear carrier, pedals, battery connector, rear wheel, headset, handlebar, saddle, front wheel, fenders, and display.
25Km Checklist
You have spent some time with your bike now. After riding for 25 kilometers, some parts naturally start settling in. That means as time passes, they may get loosened. Therefore, it is good to inspect them. Components such as kickstand bolts, saddle bolts, and handlebar bolts must be checked and tightened.
Other things you can do are: inspect the brake pads, wires, and PAS sensor. Finally, look at your battery charger port to ensure no dust or moisture has entered it.
100Km Checklist
After pedaling with your bike for 100 km, you must inspect parts such as paddles, rear carrier, display, lights, battery connection, and fenders. Also, check your front fork, clean it (with a damp cloth), and apply some grease to it.
The chain and freewheel are other parts that need checkup plus lubrication. The seat post, headset, bottom bracket, and handlebar stem are similar parts to look after and lube.

Full E-bike Chain Cleanup
How to tune a bike? Every bike is composed of parts working together to propel the whole machine forward. Your first step is learning about the everyday wear and tear in e-bikes and following the instructions.
As fun as riding on your e-bike is, it is inevitable that it will get dirty with all that mud and stud on the roads you take. This is especially normal when you go to ride during this time of the year when rain and dirt are common everywhere. Therefore, you may notice big and small muddy spots covering your frame, chains, and cassette after every riding session.
. If you want to clean the frame, remember to use a damp cloth and never apply a direct stream of water to its motor/battery. Though Envo products' electronics are water resistant, they are not waterproof.
Chains are also one of the components which need constant cleaning to maintain them. Your e-bike's chain can be polished using various methods. Cleaning the chain of its road grime will sustain its optimum function by preventing it from wearing down.
You will need a selection of tools to do the job on your chains: sponge, chain bath, cleaner, and brushes.
- The first method explained is a chain-on method, meaning you don't need to release the chain off your e-bike. You will use a chain bath and put a degrease into its chamber. Then put the bathing tool on the chain, press the bottom to release the cleaning liquid into the container, and spin the chain backward using your free hand. The chain will go through the bath, and most of the dirt will get removed entirely mess-free in about 5 minutes. To make things cleaner, grab your sponge and brushes to do extra cleanup on places like jockey wheels and sprockets of the cassette.
- The second method involves taking the chain off the e-bike and immersing it into a container filled with cleaner and water. Additionally, this cleanup technique is primarily applicable when there have been weeks since you cleaned up the chains. Now dirt has just built up excessively on it, and you must remove it first to clean it up.
Use a chain breaker tool to loose the chain and disengage it from your bike. Then, put it in a jar filled with cleaner, and shake it for some minutes until the color of the cleaner changes. Repeat it if necessary. Then rinse the chain and dry it using a cloth. Ensure it is completely dried up before putting it on the e-bike and then applying the lube.
Remember to go through the cassette, jockey wheels, and chainring to ensure no grime is left on them, as it can back onto your new chain.

Steps to Retrieve a Pristine Cassette
Your e-bike cassette will absorb dirt and grime as time passes and needs special care and cleanup. There are three ways to do a cassette cleanup. The final result will resemble one another, but the method you pick up depends on how much time you want to spend and what level of cleanliness you expect to get. You may clean your cassette while on the bike, remove the wheel from the e-bike, and thoroughly clean it. Finally, remove the cassette itself from the wheel for extra cleaning.
You will need a cleaner, a sponge, some cleaning brushes (detailed brush, drivetrain brush, and a bigger one with stiff bristles), a rag/ old t-shirt, and the hose pipe.
- Put your bike on a work stand (if you have any. If not, leaning it up against some fence or a wall will do the job).
- A note of caution for your disc brake: you may put a protector on it to prevent contamination. However, don't worry if such luxuries are not at hand; cardboard with a hole in it will do the same thing.
- Before spraying, put the chain in a small sprocket. This way, the cassette is exposed as much as possible.
- Spray your cleaner onto the cassette while spinning it around.
- Take the drivetrain brush and try to work the degreaser into every part of the cassette to get off all the dirt.
- Do some backpedaling with one hand and rinse the cassette using a hosepipe.
Usually, you will be able to clean the bulk of the grime and dirt built up this way. But if you want an even better cleanup, you can proceed with the following directions.
- Remove the wheel from the frame.
- Take the cleaner and spray it generously onto the sprockets.
- Grab the right brush and remove any remaining grime or oil left on or in between the sprockets. Wear gloves to keep your hands clean.
- Shake the wheel to remove the excess water.
- You can use a rag or an old T-shirt to have the final clean. Hold it tight, stretch it, gently rub it against the sprockets, and work it around.
- The alternative way for your cassette cleaning (especially if it has been quite some time since you haven't cleaned it) is to remove the cassette itself. Then, put it into a container filled with a mix of water and cleaner and leave it for a good soak before rinsing and drying up.

How to Adjust Your E-bike's Brake Cables?
There are two type of cable based braking systems found on bicycles. One is the V-Brake type where the adjustment is located at their caliper, and the other is their disc brakes, where adjustment is made through the barrel adjuster.
When is the time to make the adjustments? Generally, whenever you have to use force to pull the brake lever to decrease your speed, it signals the time for brake cable adjusting has come. Another red flag is seeing the lever squeezing into the handlebar.
What does it all mean? Under normal conditions, you need to squeeze a bike brake lever 3-4 cm before it gets difficult to squeeze it anymore. Any abnormal looseness or tightness of your brake lever needs attention.
Hopefully, some minor adjustments by the barrel adjuster will solve these problems.
- For this, you need to manipulate the tension in the cable while turning the adjuster clockwise or the other way.
- If such tricks don't solve your problem, you must investigate your brake caliper cable.
- Grab an Allen key to lose the cable, but watch out! You should not unbolt the entire caliper; open it as much as needed to pull the cable out or retract it inward.
- To tighten the brake, pull the cable outward and to make it loose, let the cable retract inwards.
- If your brakes type is V-Brake , adjust it so that the pads do not touch the rim.
- The cable that leads to the disc brakes goes through a lever on the caliper. If you have to tighten the cable, remember to leave enough room for the lever to move.
- After finding the optimum spot where both bike brake pads are placed comfortably over the rim and the cable is tight, tighten the caliper bolt.
- Do a final check, and repeat the steps if the final result is not satisfying.

Replacing Brake & Gear Cables, Explained
Your bike's brake and gear cables might need replacement when frayed with constant use, worn out, or sticky. Follow the steps to know how to replace them, respectively:
- First, remove the existing (brake) cables. Find the barrel adjuster and turn it clockwise. Then unscrew the retention bolt at the caliper and cut the cable off at its end.
- If your bike uses a V-Brake or any other brake type installed on it, pull the brake lever to push the cables out.
- After releasing the inner cable, it is time to insert the cable back into the router. To direct the cable through the lever, pull the lever to help release the cable. If your brake lever is also flat-bar type, there is a hinged slot which you need to unhook the cable end from.
- Pull out the entire cable through the lever top.
- Based on whether you have internally or externally routed, you must follow different steps to replace your worn-out/contaminated cable. Here the instruction works best for externally-routed cables.
- To replace external cables on your bike, unwrap the bar tape on your handlebar and remove any tape used for holding the cables. Again, if your bike uses a flat bar, release the cable from the barrel adjuster and frame.
- Cut cables for sections you want to replace.
- To ensure the smooth running of the cable (and braking), pay attention to doing a good finishing on the cable end. You can use grind/file to soften the rough edge. When done, put ferrules on each cable end.
- If your bike uses drop bars, you should start by inserting the cable into the lever. Then pass it along the bar and use tape to fix it.
- Now do the same along the frame and front brake. Simultaneously, pull the lever to feed the inner cable back via the lever body and into the cable.
- After ensuring all the quick releases are closed, feed the inner cable via the slot for the cable clamp and fix it in place. Now, turn the adjuster once anti-clockwise.
When you want to replace your gear cables, follow these steps:
- First, you need to remove the old gear cable. Notice that the gear cable is often hidden beneath the hood or behind a bung.
- Shift to the lowest gear to inline the cable carrier with the opening.
- To pull the cable out from the shifter, undo the clamp at the derailleur.
- For outer gear cable replacement, the rest you need to do is the same as replacing brake cables.
- To know how to precisely cut the cable, use the old cable as a guide and finish the end of the cable with filing/grinding. This way, you can make sure of a smooth shifting function.
- Insert the new cable via the shifter lever, housing, and first section of the outer. The cable must fit tightly to the lever body. If using drop bars, apply tape to fix it.
- Repeat the feeding process of the new cable through stops, bottom bracket guides, outer cable, and mech clamps.
- Before fitting the end caps of cables, trim all cables and leave 3cm projecting out of the cable clamps intact.
- Use side cutters to crimp the end caps. Be careful not to splay the end. Now, apply enough glue before fixing an end cap into its place.

Lube Chain The Right Way
Lubing the chain is essential in propelling you forward when riding your e-bike. A frictionless chain will allow you to enjoy a smooth ride.
Regular cleanup, applying the correct type of lube (wax/wet/dry lube in drop a bottle/spray format), and the right amount of lubricant on the chain are three points on how to lube bike chain worth remembering. To choose the best oil that works out for your bike chain lube, consider the conditions and frequency you actually ride in. Be careful not to over-lube your chain, as it will cause other problems to appear. Here is how it goes:
- Set your e-bike on a work stand (If you don't have one, you can lube it on the ground).
- Pedal the bike with one hand (if on the ground, backpedal it, stick an Allen key into the chain ring and then backpedal it).
- Lube inside the rollers of the chain to ensure it will penetrate the roller. Never apply lube from the top of the chain.
- Go one roller after another, applying the lube.
- Use a cloth to remove the excess oil from your chain.

Complete Instruction on How to Adjust Derailleur
Rear derailleur issues can get quite frustrating. You may suspect such a problem with your e-bike when, while pedaling, you get a consistent clicking noise or your shifting gets inconsistent. Ultimately, you may need help to shift into your desired cogs on your bike cassette. Any of these should make you suspicious of some derailer issues which need adjustment.
The rear derailleur adjustment comes after ensuring that no chain, cable, or housing wearout is adversely affecting your bike shifting potential. Accordingly, there are three kinds of modifications you can make. Accordingly, there are three kinds of changes you can make.
The first is limiting screw settings to let the derailleur move up and down the cogs in the bike's cassette. Moving the screws clockwise will restrict the movement of your bike's chain outward, called the low limit. On the other hand, a counterclockwise turn will loosen the said screws; hence, the chain is free to move farther outward. This is also called the high limit.
The whole purpose of the adjustments you make with tightening or loosening the screws here is to have your chain onto the right cog of the cassette when pedaling. You need to do the same for the front derailleur adjustment of your bike, too.
How to adjust the low-limit screw?
We want to prevent the chain from skipping to or pushing past the cassette and into the spokes. In fact, the following allows the chain to lay on the largest cog on the cassette.
First, inspect the low-limit screw to ensure it is set appropriately. Then push the derailleur's body toward the larger cog. You may use your thumb finger to do this. Tighten the screw so the chain may not move past the largest cog toward the spokes.
Now check to see if you can shift into the largest cog. If not, then there might be a cable tension issue. Using your thumb again, move the derailleur to the largest cog. Pedal forward to seeing what happens. At this point, there should not be any chain jumping. If it is any, lose the limit screw and check until there is no jumping.
How to adjust the high-limit screw?
To adjust the chain such that it won't fall off the cassette and into the dropout of the bike's frame, follow these steps. First, check to see if the derailleur will move into the smallest cog. If not, you should suspect some problem with cable tension; therefore, you need to remove the tension. After tension removal, check to see if shifting into the smallest gear is done smoothly.
Check to see if the derailleur's top jockey wheel is right under the said cog. You need to turn the high-limit screw counterclockwise to prevent it from getting too far toward the frame. However, if the pully is too far out from toward the dropout, you need to turn the said screw clockwise to adjust it.
Now check to see if everything is going well. Your chain sitting on the smallest cog should make no clicking or unusual sound. If it does, loosen the height limit screw a quarter, and it should remove the strange sound.
When the high limit is set too far, your chain jumps while trying to move off the cassette. Make the high-limit screw tighter to stop chain jumping.
B Tension Screw
Inaccurate shifting, which results from B tension, is another common problem with derailleurs. This particular screw, called the B tension screw, affects the body angle of the derailleur. Your job is to make sure it is set appropriately.
To see if your B tension is too low or too tight, you need first shift into the second largest cog in the cassette. Check if the top pulley is too close to the cog or touches it. If any of these two happens, the "B" tension is too low (since the screw is too tight), and you need to tighten the screw. Turn it clockwise, and it should take the pulley away from the cassette.
Cable Tension Indexing
Finally, we come to the third common adjustment of your e-bike's rear derailleur. Cable tension or cable stretch happens when your bike's cable settles into the housing part and creates problems with the cable's smooth shifting. First, look to find your barrel adjuster, which is usually close to the cable exit point on the rear derailleur.
Turning the adjuster in will cause the space between the cable's ends to narrow, and as a result, the tension on the cable is reduced. Suppose you turn the adjuster counterclockwise or screw it out. In that case, the reverse will happen, meaning the space between the cable's ends get broader and more tension is put on the cable.
First, you must shift to the smallest cog on your bike's cassette. Start pedaling and clicking the shift lever to move to one larger cog. The purpose is to see if the derailleur shifts to the next cog quickly or not. If it doesn't, counterclockwise the barrel adjuster to introduce one-quarter of cable tension.
Second, click the shifter lever again to check if the adjuster moves correctly into the larger cog. Look to see how the chain behaves. If it rubs on the next highest cog or skips two cogs in the cassette, cable tension is involved, which needs resolution. Turn the adjuster clockwise for one-quarter of a turn at each attempt.
Continue with your attempts to go into larger cogs. If there is any problem with chain shifting or hesitation, add more tension to the cable.
Once you have made sure that the chain moves quickly between the larger cogs of the cassette, check to see how it shifts back to the smallest cogs. Go ahead with adjusting the tension until the result is satisfactory.

Check Spoke Tension Following This Guide
When the wheel turns, spokes get loaded and unloaded, such that those located at the bottom of the rim will have a drop in tension. It happens all along riding, and each spoke is under constant pulling force, measured based on (KGF) or in (N).
However, when speaking about spoke tension, the collective pressure of the spokes of a whole wheel is intended. In reality, maintaining the optimum balance of the entire wheel system matters.
Now, if the spokes relax too much (which happens under low tension), the result is a snapping effect which puts both the spokes and the rim under pressure. The final outcome can be broken spokes, rim wear, and a malfunctioning wheel. The same results also follow when spoke tension is high.
Although squeezing the spoke with hands can be a method for measuring its tension, a more accurate way is using a spoke tension meter. To adjust the spoke tension, follow these steps:
- Use something (like a park tool truing stand) as a wheel holder when adjusting the spoke tension.
- To know what size the spoke wrench is to turn the nipple at the end of it, note that at Envo, we use a 13 gauge spokes wrench. If you ride an e-bike of another brand, consult your rim manufacturer's website or any document for the exact figure.
- To achieve good relative tension, use a spoke tension meter. If the overall tension is low, you should adjust it and raise the pressure and vice versa.
- Consult reliable sources to know the right spoke tension kgf of the wheel.
- Adjust the spokes on the drive side one-quarter turn each. For those on the opposite side, consider one-eighth of a turn.
- Use your spoke tension meter and measure the tension to see how much further adjustment is needed on each wheel compared to the standard number.
- Do the reverse to decrease the extra tension on your spoke.

How to Inflate Your E-bike's Tires
In the final section of your complete e-bike tune-up guide, let's review the steps you should take to pump your tires. First, we talk about air pressure for bike tires.
- Tire Pressure
Tire pressure makes a big difference in the behavior of your bike. Yet, it is effortless to adjust and maintain.
Lower tire pressure is more comfortable as it allows the tire to adapt to the road surface. However, it is more susceptible to flats and far less efficient.
Higher pressure makes your bike feel much more agile, sporty, and efficient with the tradeoff of a little less comfort. However, a front suspension will compensate for most of the lost comfort.
Pumping – Presta Bike Valve vs. Schrader Bike Valve
There are two bike tire valve types: Presta and Schrader. At Envo, we use Schrader valves, the same as a car or truck valve. Most pumps can accommodate both types; sometimes, the pump might need an adjustment. Make sure the pump is set to the larger hole.

Recommended tire pressure:
Tire manufacturers usually indicate a minimum and maximum pressure directly on the tire. Most of the time, the marking is black on black and molded in the rubber, thus difficult to see.
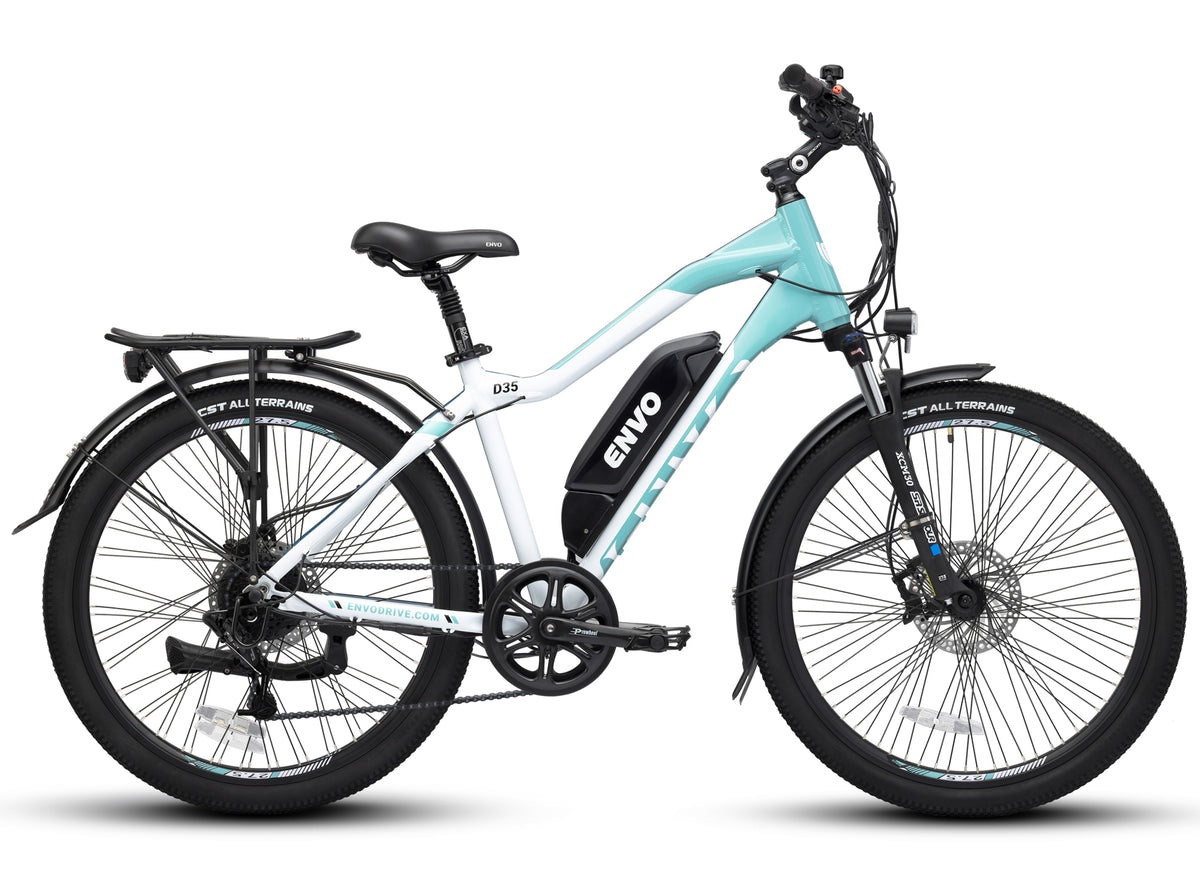
For Envo bikes (D35, ST, and Lynx), we recommend a bike tire pressure somewhere between 45 and 60 psi. If you are a lighter rider, you'd want to go closer to the low end of the spectrum; and vice-versa.

Check the brake pads
At Envo, we only use disc brakes, which can decelerate you faster than any machine can accelerate you! For this to happen, brakes must quickly transform kinetic energy into heat.
The magic resides in the brake pads, which are made of a high-friction organic compound fused to a metal backing plate. This compound is designed to grip the metal rotor yet not wear it down. It's actually the compound itself that slowly wears off.
However, when thoroughly worn out, the backing plate contacts the rotor, resulting in a metal to metal friction. This usually results in poor braking performances, high-pitch noise, and, worse case, brake failure.
Thus, replacing your bicycle brake pads from time to time is essential. The lifetime of your pads varies greatly depending on your usage. Commuting on a route with lots of city lights, going downhill, and carrying heavy cargo are all factors that can negatively impact your brake pad's life.
Metal Backing Plates
In most cases, you should be able to check or replace your brake pads without removing your wheels. You'll have to do the following steps.
-
Locate:
Brakes are located on the left side of your bike, also known as the non-drive side. They are either mounted on the fork (front) or the frame (rear).
Once you have located the brake caliper, look at it from the top. You should see an opening that lets you see the rotor and the pads.
- Remove:
The pads are retained by a cotter pin. Remove the pin, then extract the pads.
- Asses:
Look at the pads' compound thickness and use the following image to assess the wear level

- Replace or reinstall:
No matter if you decide to keep the same pads or replace them, the reinstallation procedure is the same.
Place both pads in the caliper.
Slide assembly in caliper around the rotor.
Reinstall the cutter pin.
- Bed In:
Brand-new brake pads have a pretty smooth surface due to the manufacturing process. It is essential to slowly wear out this smooth surface. Otherwise, the heat generated during braking can render the pads useless.
To avoid this, you'll need to "bed in" the pads. Do this by slowly braking and slowly increasing the brake temperature. For example, you can pump the brake.
Conclusion
One of the frequent questions e-bike riders ask is how to tune up a bike? This article presents you with a complete guide on a full e-bike tune-up. Since we are in the cold seasons of the year, knowing how to maintain and tune up your bike for fall and winter makes sense.
We started by discussing the necessity of tune-up and its service intervals. Then listed the steps you need to take to know how to inflate bike tire, how to adjust rear derailleur, and when to clean each major part of your bike.
The components covered for e-bike riders include: chain and cassette cleanup, bicycle chain lube, cable adjusting, and replacement, checking spoke tension, derailleur adjustment, an-d, finally, pumping your tires the right way. There are other things to consider, like you need to adjust a front derailleur from time to time, as taught in the link above.
